
Have you noticed parts of your vinyl flooring starting to lift? The floors are meant to last and look good but when they start lifting it can be annoying.
Lifting can happen as a corner curling up or an entire section losing its grip. The good thing is you don’t need to be an expert or have unique tools to handle this.
Fixing a lifting vinyl floor can prevent further problems like moisture entering the rest of the tiles and lifting them up. This may be expensive since you may need to replace the whole floor.
Why Does Vinyl Flooring Lift?
Vinyl flooring is popular in many homes because it offers a polished look that works well in nearly any room. When sections of vinyl flooring start lifting, you might notice that some areas pull up at the edges or bubble in the middle.
This doesn’t happen without a reason.
Common Reasons Your Vinyl Flooring Lifts
The most frequent cause of lifting is improper installation. This can happen if the adhesive wasn’t applied evenly or there wasn’t enough time for the glue to cure properly.
| Cause | Description | Prevention |
|---|---|---|
| Improper Installation | Adhesive not applied evenly, insufficient curing time, or lack of expansion space. | Ensure proper adhesive application and allow curing time. Leave space for expansion. |
| Moisture Exposure | Water leaks or spills weaken the adhesive, causing the vinyl to lift. | Use waterproof adhesives, wipe up spills immediately, and control humidity. |
| Heavy Traffic & Wear | Frequent foot traffic and furniture movement can loosen vinyl over time. | Use rugs in high-traffic areas and felt pads under furniture. |
| Temperature Fluctuations | Expansion in heat and contraction in cold can cause lifting if not accounted for. | Allow for expansion gaps during installation and maintain consistent indoor temperatures. |
This makes sections of the vinyl to eventually lose their grip. Another installation issue is not leaving enough room for the flooring to expand and contract with temperature changes.
Water can also seep under the vinyl, especially in kitchens, bathrooms, or basements, where spills or leaks are more common. This weakens the adhesive and causes the vinyl to lift.
How Wear and Tear Can Contribute
Floors are meant to take live load from daily walks to objects being placed or moved on them.
- High-traffic areas, like hallways or living rooms, can see the material gradually loosen as people walk over it.
- Heavy furniture or sharp objects can also cause small tears or cracks, which may lead to lifting over time.
- Changes in the temperature and humidity of your home can also be a factor. Vinyl flooring expands in warmer weather and contracts when it gets cooler.
If the installation didn’t account for these changes, it could eventually result in lifted sections.
Gathering the Right Tools and Materials
Fixing your vinyl flooring is much easier when you have the right tools and supplies ready to go. Trying to work with whatever you have on hand can quickly turn a simple repair into a frustrating mess.
Having the proper materials ensures that your repairs are effective and long-lasting.
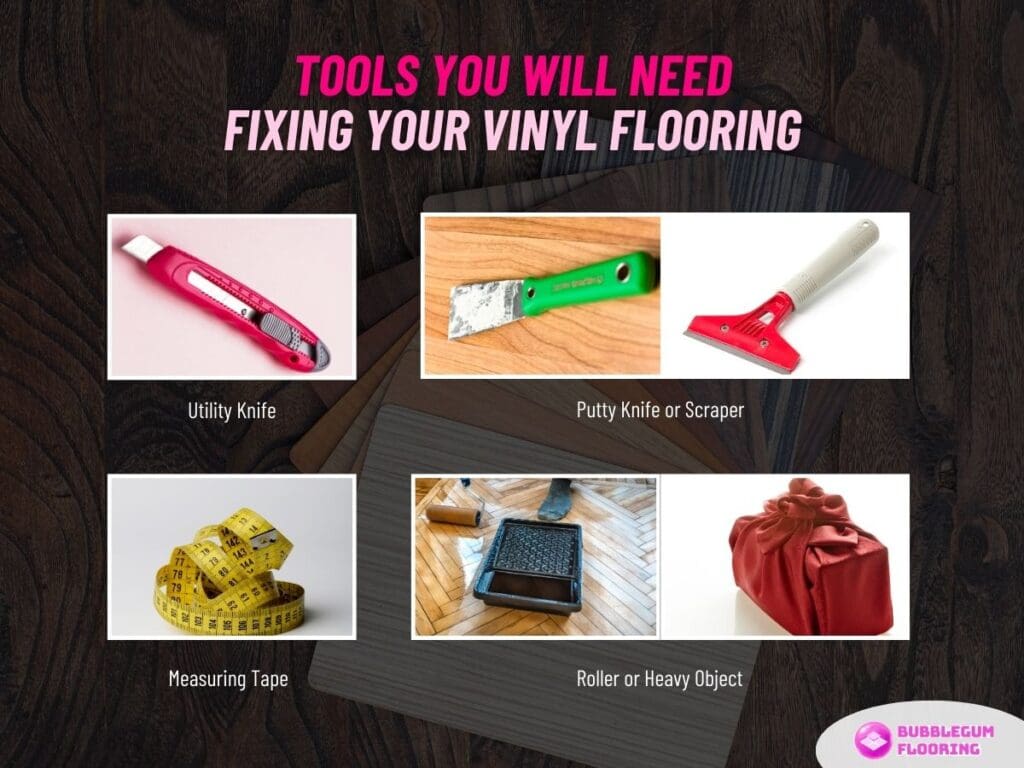
Simple Tools You Will Need
- Utility Knife: A sharp utility knife helps you make clean cuts, whether you’re trimming excess vinyl or removing damaged sections.
- Putty Knife or Scraper: This is essential for evenly spreading adhesive or lifting up stubborn pieces of flooring without damaging them.
- Measuring Tape: Accurate measurements ensure that any replacement pieces fit perfectly and that you’re not wasting materials.
- Roller or Heavy Object: A roller helps press the vinyl firmly into place, but if you don’t have one, a heavy book or a weighted object wrapped in a soft cloth can work as well.
The Best Adhesive for Vinyl Repairs
The adhesive you use can make or break your repair.
| Type | Best For | Pros | Cons |
|---|---|---|---|
| Double-Sided Vinyl Tape | Small edges and corners | Easy to use, no mess | Not ideal for large repairs |
| Vinyl Flooring Adhesive | Large lifted sections | Strong bond, long-lasting | Requires precise application |
| Waterproof Adhesive | Areas with moisture exposure | Prevents future lifting due to water damage | May take longer to cure |
- For small fixes, double-sided vinyl tape is a quick and easy option. It provides a strong hold without the mess of liquid adhesive.
- For larger areas, a vinyl flooring adhesive is a better choice. Make sure to choose one that’s suitable for your flooring type and compatible with your subfloor material.
- If moisture caused the lifting, look for waterproof adhesives. These will create a stronger seal and help protect against future issues.
Always follow the manufacturer’s instructions for the best results.
Prepping the Area for Repairs
Before starting the repairs, it’s important to prep the area. This is because poor installation can lead to uneven fixes or recurring issues.
1. Cleaning Up the Space Around the Lifted Section
Start by thoroughly cleaning the area around the lifted vinyl. Dust, dirt, and debris can interfere with the adhesive’s ability to bond properly.
Use a vacuum or a soft-bristle brush to remove loose particles, and then wipe the area with a damp cloth or mild cleaning solution. Let it dry completely before moving on.
If there’s old adhesive residue on the subfloor or the underside of the vinyl, carefully scrape it off using a putty knife. Be gentle to avoid damaging the vinyl or the subfloor underneath.
2. Checking for Underlying Damage Before You Start
Once the area is clean, take a closer look at the subfloor and the vinyl itself. Check for signs of moisture, like discoloration or a musty smell, as these could indicate a bigger issue that needs attention.
If you find moisture, it’s important to address the source before continuing with the repair. Inspect the edges of the lifted vinyl for tears or warping.
If the vinyl is damaged, you may need to replace the affected section instead of simply reattaching it.
Fixing Small Lifting Sections
When only a small part of your vinyl flooring is lifting, fixing it becomes quick and straightforward. These small issues often pop up at the edges or corners where the adhesive has loosened over time.
There’s a way to carefully reattach the section without advanced skills or tools.
How to Reapply Adhesive to a Corner or Small Edge
- Lift the Vinyl Gently: Start by carefully lifting the loose section of vinyl. Avoid pulling too hard, as this could tear the material. Use a putty knife if needed to help ease it up.
- Clean the Underside and Subfloor: Use a damp cloth to wipe away dirt or old adhesive from both the vinyl and the subfloor. Let everything dry completely before moving on.
- Apply Adhesive or Tape: For small areas, double-sided vinyl tape is a simple and effective solution. Place the tape evenly along the edge or corner. If you’re using liquid adhesive, apply a thin, even layer to the subfloor.
- Press the Vinyl Back in Place: Carefully press the lifted section back down, aligning it with the surrounding flooring. Use your hands to smooth it out and remove any air bubbles.
- Weight It Down: Place a heavy object, like a stack of books or a weighted roller, over the repaired area. Leave it in place for the recommended drying time, usually 24 hours.
Tackling Larger Lifting Sections
When larger sections of vinyl flooring start lifting, the process gets more complex and requires some careful steps. These issues often happen when the adhesive weakens over a wide area or when problems, like moisture or improper installation, come into play.
While the process takes a bit more effort, it’s entirely manageable if you approach it step by step.
The Best Way to Loosen and Lift Without Causing Damage
Start by gently lifting the loose vinyl with a putty knife or scraper. Work slowly to avoid tearing the material.
If the adhesive is holding in some spots, use a heat gun or hair dryer on low heat to soften it and make the removal easier. Once the vinyl is lifted, clean the subfloor and the underside of the vinyl.
Remove any old adhesive, dust, or dirt using a scraper and a damp cloth. For stubborn residue, an adhesive remover can help, but be sure to follow the instructions on the product.
Be sure to check the subfloor for signs of moisture or damage. For example, if you find mold or water damage, you may need to replace part of the subfloor before reattaching the vinyl.
How to Evenly Reapply Adhesive to a Larger Section
- Apply New Adhesive Evenly: Use a trowel to spread vinyl flooring adhesive evenly over the subfloor. Pay attention to the edges and corners to ensure a strong bond. Avoid applying too much adhesive, as it can create lumps or seep out when you press the vinyl down.
- Reposition the Vinyl Carefully: Align the vinyl with the surrounding flooring, making sure it fits snugly and evenly. Slowly press it down, starting from one edge and working your way across to avoid trapping air bubbles.
- Roll or Press the Vinyl Firmly: Use a roller to press the vinyl into place, or place a heavy object on top to help the adhesive bond securely. Check for any air pockets or uneven areas, smoothing them out as you go.
- Allow Time to Dry: Follow the adhesive manufacturer’s drying time instructions. Avoid walking on the repaired area until the adhesive has fully cured.
Making Sure the Repair Stays in Place
To make sure your hard work lasts, you’ll need to take a few extra steps to secure the repair. This is especially important for high-traffic areas where the flooring is more likely to experience stress.
Simple Tricks to Keep the Vinyl Flat While It Dries
Place a heavy, flat object on top of the repaired area, such as a stack of books, a filled toolbox, or a piece of plywood with weights on top. Be sure to distribute the weight evenly to avoid leaving impressions on the floor.
Before the adhesive dries, inspect the area for any air pockets or uneven spots. If you find any, press them out gently using a roller, a plastic scraper, or your hands wrapped in a soft cloth.
Adhesive takes time to fully cure, so avoid walking on the repaired section for at least 24 to 48 hours, depending on the product instructions.
Why Weight Distribution Is Key After Repairs
Even pressure across the repaired area helps the adhesive form a strong, lasting bond. Uneven weight or skipping this step can lead to weak spots where the flooring may lift again.
Using weights that cover the entire repaired section ensures consistent contact between the vinyl and the subfloor.
For larger repairs, consider using multiple weights or tools like a flooring roller to achieve even pressure. The better the initial bond, the less likely you’ll need to revisit the repair in the future.
Preventing Future Lifting Problems
Once you’ve repaired your vinyl flooring, it’s worth taking steps to prevent the issue from happening again.
1. Clean Regularly but Gently
Dirt and grime can build up over time and weaken the adhesive under your vinyl flooring. Use a soft broom or vacuum with a gentle setting to keep your floors clean.
When mopping, use a damp cloth and avoid harsh cleaning chemicals that could damage the adhesive.
2. Protect Against Moisture
Moisture is one of the biggest culprits behind lifting vinyl. Wipe up spills immediately, and use rugs or mats in areas prone to water, like near sinks or entryways.
For bathrooms and basements, consider using a dehumidifier to reduce overall humidity levels.
3. Use Felt Pads Under Furniture
Heavy furniture can cause wear and tear on vinyl flooring, leading to lifting over time. Attach felt pads to the legs of chairs, tables, and other pieces to reduce pressure and prevent scratches or dents.
What is the Best Mil Layer for Vinyl Flooring?
With the right tools, careful preparation, and a little patience, you can fix lifting sections of your floor. As you move forward, keeping your floors in great shape is about more than just repairs.
Knowing the quality of your vinyl and its construction can make a big difference. One important aspect to consider is the mil layer—the wear layer that protects your flooring.
The thickness of this layer impacts your floor’s resistance to damage, like scratches, dents, and even lifting. Choosing a vinyl flooring option with a thicker mil layer can save you from dealing with frequent repairs and give you peace of mind about its long-term durability.